HH Fitness

Sides

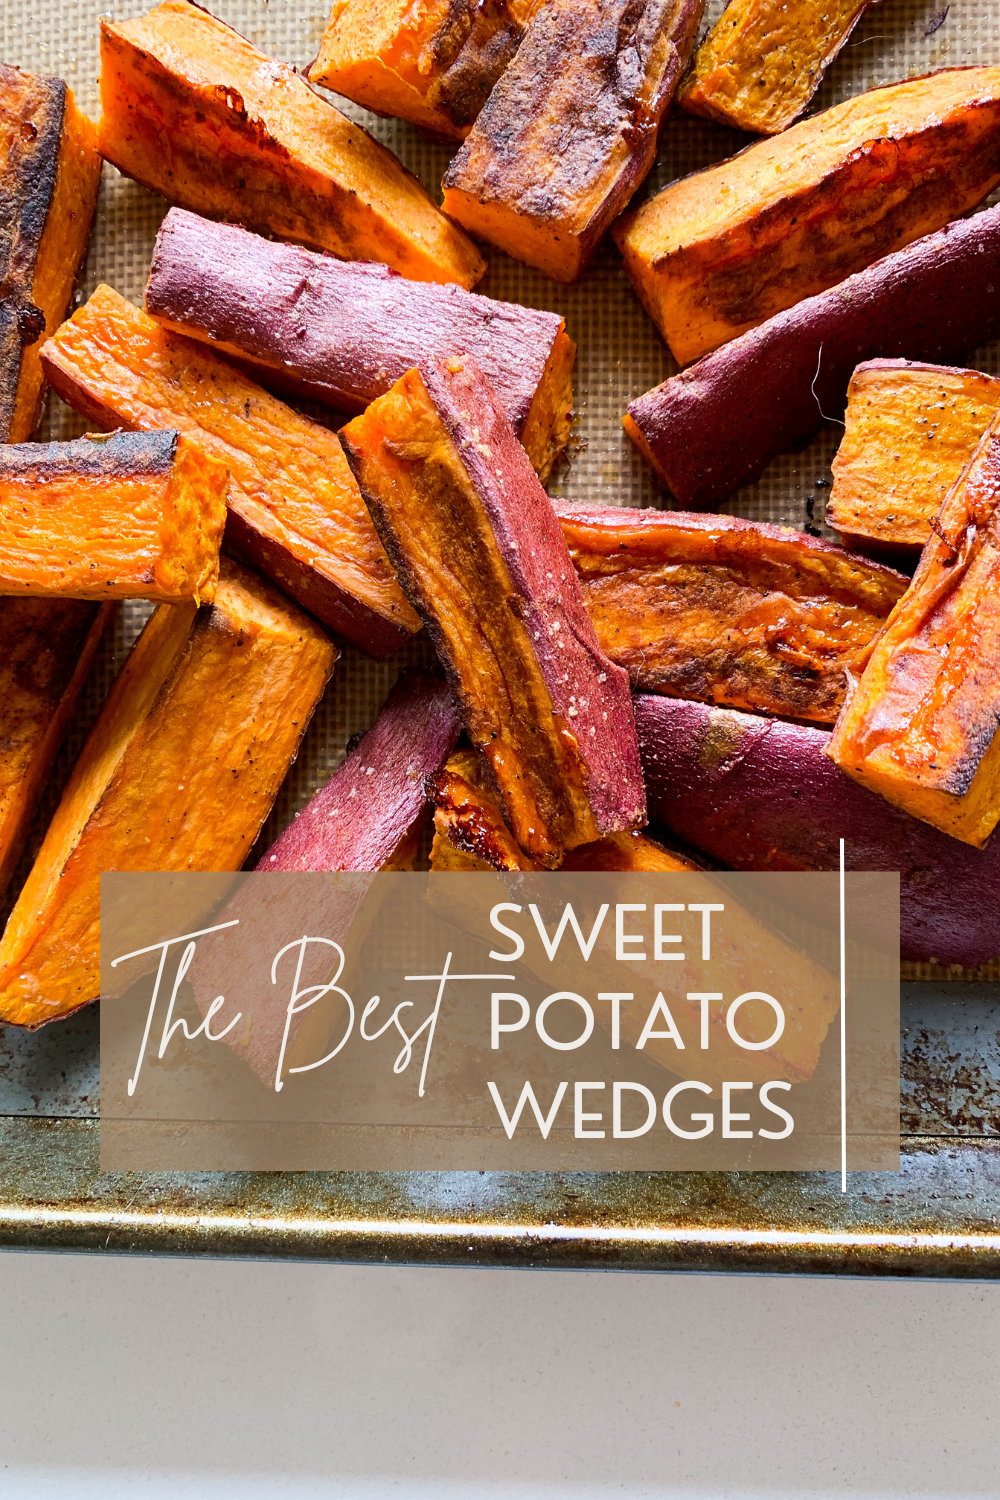
The Best Sweet Potato Wedges (with a homemade aioli!)

Haley HansenComment

WHAT’S INSIDE:

  • sweet potato - the most delicious of all potatoes, in my opinion. the sweet potato is a bit more nutrient dense than other potatoes - containing more vitamin A, vitamin C, beta-carotene, and fiber. it’s also more flavorful and fun! in this recipe, we’re balancing the sweetness of the potato with a tangy, garlicy aioli. yum!

  • avocado oil - the best oil to use for high-heat cooking (any temp greater than 350F) because of its high smoke point. read more about cooking oils here!

RECIPE

Sweet Potato Wedges:
2 large sweet potatoes, about 2-2.5 lbs total)
2 tablespoons avocado oil
1 teaspoon sea salt
1 teaspoon fresh cracked black pepper

Simple Homemade Aioli:
1/4 cup mayonnaise (I recommend brands that use olive oil or avocado oil)
1 small garlic clove
1 teaspoon fresh lemon juice
Fresh cracked black pepper

  1. Preheat the oven to 450F and line two baking sheets with parchment paper.

  2. Wash , scrub, and dry the potatoes. Cut the ends off, then slice them in half crosswise. Place the flat portion on the cutting board and slice from top to bottom to form thick wedges. I kept mine about the size of my thumb, maybe a little bigger. The wider the wedges, the longer the roasting time - keep that in mind.

  3. Spread the wedges on the baking sheet in one even layer and drizzle the olive oil over the top. Use your hands or a cooking brush to coat each wedge on all sides with oil. This is very important to ensure a soft, yet crispy and evenly cooked texture all around, and to ensure that the seasoning adheres to each wedge. Season with salt and pepper, and toss to combine.

  4. Roast for 30 minutes, flipping the wedges halfway through. Rotate the pans at this point, as well - top to bottom and bottom to top, and front to back and back to front - since the back of the oven tends to stay hotter than the front.

  5. While the wedges cool, make the aioli. Whisk together the mayo and lemon juice, and then grate in the garlic clove using a small mandolin or cheese grater and whisk again.

  6. Serve wedges with the aioli immediately. Leftover wedges will last in an airtight container for up to one week, and leftover aioli will last until dated on the mayo bottle.

  7. Enjoy!

Buffalo Cauliflower Wings (baked!)

Haley HansenComment

WHAT’S INSIDE:

  • cauliflower - star of the show, as always. cauliflower is subbing in for what would typically be chicken. I don’t follow a vegetarian or vegan diet, but this sub is a great way to get in an additional serving of veggies, and to make a traditionally high-calorie dish lower calorie. and fun!

  • all-purpose and whole-wheat flour - this combination makes up the coating for the cauliflower nuggets. we’re using half AP and half WW for the best balance of tender, crispiness and a bit of a hearty chew and nutty flavor.

  • low-fat milk - another important component of the coating, the milk adds a tanginess and helps to bind the coating. I haven’t tried a plant-based milk for this recipe but you certainly could, if you want!

  • Greek yogurt - the dip! the dip is always essential. we’re using Greek yogurt here for a couple reasons: 1) flavor; 2) protein, probiotics, calcium, vitamin D; and 3) lower calorie substitute for what would otherwise be sour cream. make sure to buy plain yogurt with no sugar or flavors added!

  • mayo - to prevent the dip from being overly tangy and thick, we’re adding a touch of mayo, as it helps to balance both the flavor and texture. I like the olive oil version from Kraft, but feel free to use any kind you like!

  • blue cheese - I’m a biiiiiiig blue cheese gal, so that’s the purpose for this. take it or leave it.

RECIPE:

Cauliflower wings:
1 medium head of cauliflower
¾ cup all-purpose flour
¼ cup whole-wheat flour
1 cup low-fat milk
¼ cup water
1 tsp. salt
½ tsp. garlic powder
½ tsp. fresh cracked black pepper
~¾-1 cup buffalo wing sauce (Noble Made is my favorite)

Blue cheese dip:
⅓ cup Greek yogurt
1/4 cup mayo
¼ crumbled blue cheese
Salt and pepper, to taste
Fresh chives or parsley, for garnish

  1. Preheat the oven to 425F and line a baking sheet with parchment paper or a silicone baking mat.

  2. Whisk together the dry ingredients in a mixing bowl. Add the buttermilk and water and whisk again until smooth. It should be just thinner than pancake batter, so add water or buttermilk as needed until you reach this consistency. Set aside.

  3. Chop the cauliflower into small florets, keeping them as equally sized as possible. Dip each floret into the wet mixture and tap gently on the side of the bowl to remove some of the mixture.

  4. Transfer to the baking sheet and bake for 20 minutes. Remove from the oven and cool slightly.

  5. Pour buffalo sauce into a small, flatter bowl and dip each floret into the buffalo sauce, tossing to coat each piece. Transfer back to the baking sheet and bake for 12 more minutes. Broil on high for 3-4 more minutes, or until crisp around the edges.

  6. While the cauliflower bakes, prepare the dip. Stir together all ingredients in a small bowl until combined. Season with salt and pepper as needed and garnish with chopped fresh herbs.

  7. Serve immediately, and enjoy!

The Best Simple Kale Salad

Haley HansenComment

WHAT’S INSIDE:

  • organic kale - kale! rich in fiber, potassium, vitamins C and K, antioxidants, and more, this leafy green is packed with nutrition. because of its tough texture and bitter flavor, you might not be in love with it yet, but after trying this salad, you will be!

  • extra virgin olive oil - sometimes referred to as “liquid gold”, extra virgin olive oil is a high-quality fat source that can help reduce inflammation, protect and enhance the skin, and more. EVOO is rich in vitamins E and K.

  • apple cider vinegar - this tangy addition helps to brighten the flavor of the dressing, and has been shown to positively impact cholesterol and glucose levels!

  • goat cheese - because everything is better with goat cheese.

RECIPE

1 bunch chopped organic kale leaves, washed & dried (any kale you like)
2 green onions, chopped
3 tbsp extra virgin olive oil
1/2 tbsp pure maple syrup
1/2 tbsp spicy brown mustard
1/2 tbsp apple cider vinegar (with “the mother” for enzymes and probiotics)
salt & pep to taste
crushed red pepper flakes, optional
crumbled goat cheese, optional

1. Make the dressing. Add the oil, maple syrup, vinegar, & seasoning to a mason jar. Screw on the lid and shake vigorously until smooth.
2. Add the chopped kale to a large bowl & pour the dressing over the top. Use your hands to run the dressing into the kale leaves for about 2 minutes. The leaves should tenderize and turn a bright green color!
3. Add the chopped green onion & goat cheese, if using.
4. Serve immediately & enjoy! Salad should keep for up to 4 days in the fridge.

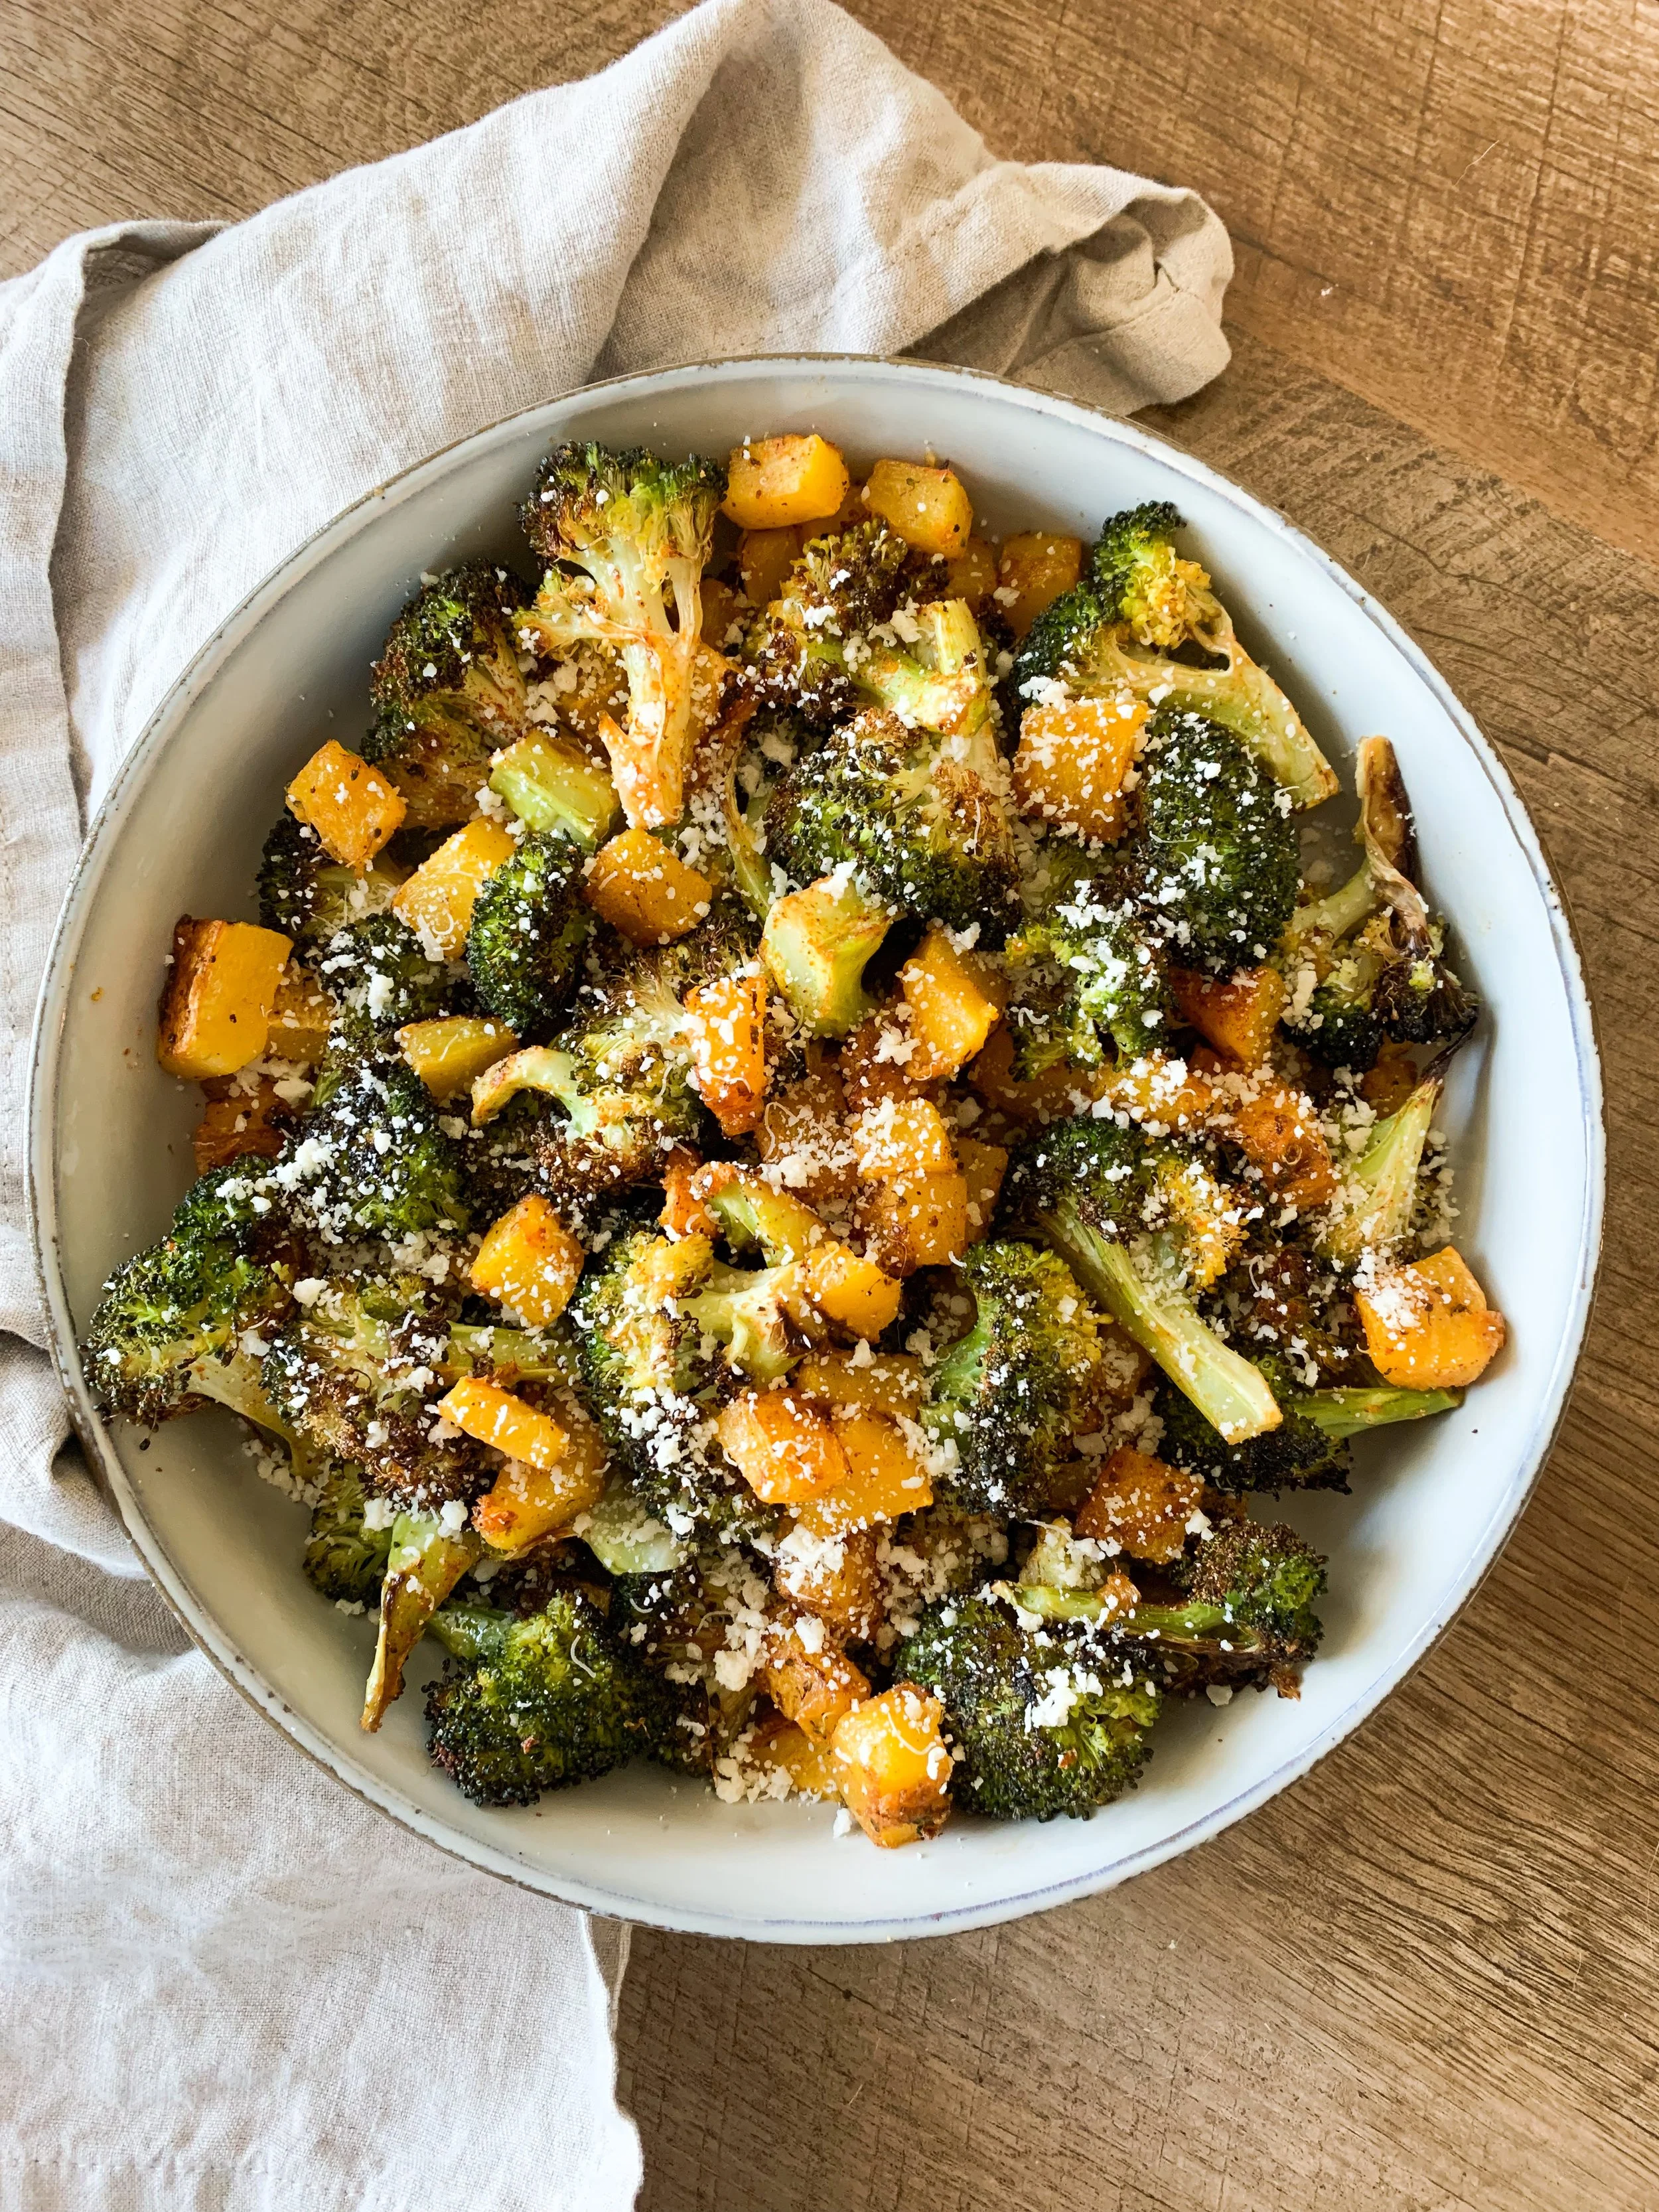
Garlic Parmesan Roasted Fall Vegetables

SidesHaley HansenComment

The perfect side dish - easy, healthy, seasonal, and so tasty! These Garlic Parmesan Roasted Fall Vegetables can be part of your weekly meal prep, or brought along to holiday gatherings. Everyone will love them!

WHAT’S INSIDE:

  • butternut squash - high in vitamins A and C, magnesium, and potassium; flavor peaks in the Fall months; significant source of fiber and slow-digesting carbohydrates. feel free to sub for sweet potatoes!

  • broccoli - high in vitamins C and K, folate, potassium, manganese, and iron; non-starchy (low-carb) vegetable; cruciferous vegetable, may have cancer prevention benefits (1)

  • garlic powder and paprika - spices to add flavor

  • grated parmesan cheese - balances the sweetness of the butternut squash by adding a salty, cheesy flavor punch

RECIPE

1 large butternut squash (about 2 lbs whole)
1 lb brussels sprouts 
1 tbsp olive oil 
1 teaspoon garlic powder 
¼ cup grated parmesan 
Salt and pepper, to taste

  1. Preheat the oven to 425F and lightly grease a large rimmed baking sheet with a touch of oil. 

  2. Peel the butternut squash and chop into 1” cubes. Cut the broccoli into similar size florets. Toss in a bowl with the avocado oil, garlic powder, and salt and pepper. 

  3. Transfer to the baking sheet and roast for about 35-40 minutes, or until the squash is tender. 
    If you want it crispy, broil on high for the last 2-3 minutes, or until desired crispy-ness is reached. Remove from the oven and cool for about a minute. 

  4. Transfer back to the mixing bowl and toss with the grated parmesan. Season with extra salt and pepper, if desired, and serve immediately! 

  5. Store leftovers in an airtight container for up to 5 days.