HH Fitness

Half-Baked Deep-Dish Chocolate Chip Cookies for Two (GF, DF, & Refined Sugar-free)

Haley HansenComment

WHAT’S INSIDE:

  • cashew butter - the creamiest of all nut butters, with the most neutral flavor! I love using cashew butter because it blends in so nicely with other ingredients. in this recipe, it replaces butter to make the cookies dairy-free and slightly more nutrient-dense!

  • honey - honey easily replaces granulated sugar in most recipes, and it’s far sweeter per ounce, so you won’t need quite as much. feel free to use maple syrup instead!

  • almond flour - ohhhh, almond flour. I used to struggle so much working with almond flour, but I’ve found over the years that it works well as the main flour ingredient in some recipes, as the sidekick in others, and should simply be left out of others. this cookie recipe is the perfect place for almond flour - we want a dense, chewy, rich, satisfying bite and that’s exactly what almond flour can do!

  • dark chocolate chips - obviously. feel free to use milk chocolate chips, or chunks (even better).

RECIPE

½ cup natural creamy cashew butter (unsweetened, should be drippy!)
¼ cup honey or maple syrup 
2 tbsp coconut sugar 
½ tsp vanilla extract 
1 egg
½ cup almond flour 
2 tbsp oat flour or 1:1 gluten-free flour blend (can also use all-purpose flour if not GF)
½ tsp baking soda 
Pinch of salt 
About ½ cup dark chocolate chips

  1. Preheat the oven to 350F and lightly grease two 7-8oz oven-safe ramekins with oil. 

  2. In a bowl, whisk together the cashew butter, honey or maple syrup, coconut sugar, vanilla, and egg until smooth. 

  3. In a separate bowl, combine the flours, baking soda, and salt. Fold the wet into the dry, then add the chocolate chips. Gently stir until no clumps of flour remain. It will be very soft!

  4. Divide the dough between the two ramekins and top with a few additional chocolate chips. 

  5. Bake at 350F for 15 minutes for an underbaked cookie, or 18 minutes for a more fully baked cookie. The batter might rise up over the edges slightly. 

  6. Cool completely before enjoying! Serve with vanilla ice cream if desired.

Garlic Butter, White Wine, and Kale Mac and Cheese

high proteinHaley HansenComment

WHAT’S INSIDE:

  • garlic, butter, and kale - we’re zhuzh-ing up boxed mac with this trio. minced garlic and beautiful green kale are gently sauteed in fragrant silky butter. mmmm.

  • white wine - crank it up one more notch, why not?!

  • Banza Shells & White Cheddar Mac & Cheese - my GO-TO pantry staple for a quick, easy, creamy, cheesy and oh-so-comforting dinner. it’s made with chickpeas, so it’s high in protein and fiber and therefore much more satisfying and satiating.

RECIPE:

1 box Banza Shells & White Cheddar Mac & Cheese 
¼ cup dry white wine (or chicken broth) 
4 tbsp unsalted butter, divided 
2 tbsp unsweetened milk (dairy or non-dairy) 
2 tbsp plain low-fat Greek yogurt 
3 stems of curly kale, washed and dried 
3 garlic cloves, peeled 
Fresh parm
Salt and pepper, to tase 

  1. Bring a small pot of lightly salted water to a boil. Add the shells and stir gently. Cook for about 6-7 minutes, reserving ¼ cup pasta water at the very end just before you drain. Do not rinse! Set aside. 

  2. Peel the leaves off the kale stems and discard the stems. Roughly chop the leaves, mince the garlic, and set aside. 

  3. Heat a large nonstick skillet over low heat and melt 2 tbsp butter. Add the minced garlic and stir, cooking for about 2 minutes until the garlic is fragrant and softened. Add the kale, stirring occasionally to let it steam and wilt. Finally, slowly pour in the wine along with a pinch of salt and stir. Let this cook over low heat for about 3-4 more minutes, then turn the heat off and set aside. 

  4. In the small pot, melt the remaining 2 tbsp of butter over low heat. Add the milk and greek yogurt and stir with a wooden spoon until combined. Add the pasta followed by the cheddar packet and pasta water. Stir to coat the shells completely. Taste and adjust seasoning if needed. Finally, gently fold in the sauteed garlicky white wine kale. 

  5. Top with fresh grated parmesan, a sprinkle of salt and pepper, and enjoy! 

High-Protein Blueberry Chocolate Chip Oatmeal Bars

Haley HansenComment

WHAT’S INSIDE:

  • Greek yogurt - to make these bars higher in protein, we’re using Greek yogurt in place of what would typically be sour cream or milk. Greek yogurt lends a creamy richness, and a subtle tang, to these bars while bumping up the protein content!

  • almond butter - don’t get me wrong, I love traditional butter, but we’re replacing it with almond butter in this recipe to aid in that higher protein content! opt for the creamiest, smoothest almond butter you can find with no added sweeteners or oils.

  • maple syrup - because who doesn’t love a little maple flavor? maple syrup is my favorite minimally processed sweetener because of the distinct flavor and the thin texture makes it easy to work with. always look for pure maple syrup!

  • old-fashioned rolled oats - you might be surprised to hear that oats are pretty high in protein! for a grain, that is. just 1/2 cup gives you 5g of protein along with 4g of fiber! I love the texture of old-fashioned rolled oats - they are the heartiest (behind steel-cut) and absorb liquid well, making them great for healthier baking.

  • almond flour - I’ve slowly developed a love for almond flour over the years. there are certain recipes it’s perfect for, and certain recipes it should stay far away from. this recipe is the former - almond flour keeps these bars lower in carbohydrates, making them great for a mid-day pick-me-up with no sugar crash to follow.

  • blueberries - the best and most beautiful berry! it pairs perfectly with the maple-almond flavors and little bursts of chocolate in these bars.

  • dark chocolate chips - essential.

RECIPE

½ cup plain 0% greek yogurt 
½ cup natural almond butter 
⅓ cup pure maple syrup
2 eggs 
1 tsp vanilla extract 
1 ½ cups old-fashioned rolled oats
⅔ cup almond flour 
1 tsp baking soda 
¾ tsp salt 
½ tsp ground cinnamon
¼ tsp ground ginger
Pinch of nutmeg 
½ cup frozen blueberries
⅓ cup dark chocolate chips

  1. Preheat the oven to 350F and line an 8x8 baking dish with parchment paper. 

  2. In a small bowl, whisk together the yogurt, almond butter, maple syrup, eggs, and vanilla extract. 

  3. In a large bowl, stir together the oats, almond flour, baking soda, salt, and spices. Sprinkle a pinch of almond flour over the blueberries and stir to coat - this helps the blueberries stay suspended in the batter instead of sinking to the bottom of the dish while baking. Add the blueberries and chocolate chips and stir until just combined. 

  4. Transfer the batter to the baking dish and spread into an even layer. Bake for 26-28 minutes, or until the edges are just golden and a toothpick poked through the center comes out mostly clean. 

  5. Cool for 30 minutes before slicing into 16 bars (4x4). Enjoy! 

  6. Store leftovers in an airtight container in the fridge for up to 10 days, or in the freezer for up to 1 month. At room temperature, they will stay good for up to 3 days. 

Simple One-Dish Roasted Chicken & Potatoes

Haley HansenComment

WHAT’S INSIDE:

  • bone-in, skin-on chicken thighs - if you want the juiciest, most flavorful chicken dish, bone-in skin-on chicken thighs are the way to go. yes, they pack a few more calories, but a rich, satisfying flavor comes along with that. bone-in thighs are a great source of collagen protein, in addition to the essential amino acids they provide!

  • potatoes - the perfect starch to soak up those silky, melt-in-your-mouth garlicky chicken juices.

  • garlic and shallot - no explanation needed.

  • avocado oil - we’re using avocado oil here because of its high smoke point. olive oil can’t withstand temps above 350F, while avocado oil endures temps of up to 450F.

  • apple cider vinegar, honey, dijon - flavor! these three ingredients pack a punch, while keeping this dish simple and satisfying.

RECIPE

5-6 bone-in, skin-on chicken thighs 
1 lb baby potatoes, washed
3 garlic cloves, peeled and minced 
1 small shallot, diced 
¼ cup avocado oil 
2 tbsp honey 
2 tbsp apple cider vinegar (or lemon juice) 
1 tbsp dijon mustard 
½ tsp ground cumin 
½ tsp ground paprika 
Salt and pepper to taste
2 sprigs fresh rosemary 
mixed greens with your favorite vinaigrette (or leftover marinade from this recipe)

  1. Preheat the oven 425F and lightly grease a 9x13 rimmed baking dish with avocado oil. 

  2. Chop the potatoes into 1-inch chunks and spread into a flat layer in the bottom of the baking dish. Set aside. 

  3. In a small bowl, whisk together the oil, honey, vinegar and mustard until smooth. Stir in the garlic, shallot, and spices. This is your marinade! Drizzle half over the potatoes, tossing to combine. Bake for about 8 minutes, then remove from the oven. 

  4. Lay the chicken thighs over the top of the potatoes, gently nestling them into one almost even layer. Drop a dollop of marinade over each chicken thigh and lay the rosemary over the potatoes. Bake for 28-30 minutes, or until the chicken is cooked through to an internal temp 165F. You can flip them halfway through for a more even bake, but you don’t need to. 

  5. Remove from the oven and cool slightly before serving over mixed greens. Enjoy! 

  6. Store leftovers in an airtight container in the fridge for up to 4 days.

Brown Butter Oatmeal Banana Bread Breakfast Cookies

Breakfast, SnacksHaley HansenComment

WHAT’S INSIDE:

  • banana - extra ripe bananas give so much to these delicious cookies: sweetness, texture, potassium, and a little fiber. make sure the bananas you use have tons of brown spots on them and are soft to the touch!

  • maple syrup - I oped for maple syrup here for a minimally processed sugar with rich maple flavor, but honey works, too. we’re keeping the sugar to a minimum in this recipe to bring out the beautiful flavors of all the other ingredients, and to keep the carbohydrate and sugar content low.

  • butter - butter! I’m a big fan, especially when it’s browned. browned butter gives an incredible warm, rich, nutty flavor to these cookies. the browned butter is really the main character here, but you can sub coconut oil or nut butter if needed.

  • rolled oats - because oatmeal cookies are better than oatmeal-less cookies. no questions asked. oats are a great minimally processed source of fiber, B vitamins, and protein (yes, really!).

  • whole-wheat pastry flour - I used this because it was what I had on hand. it’s half whole-wheat flour, half all-purpose flour. feel free to sub 100% of one or the other, just keep an eye on the texture of the finished dough. if you’re going 100% whole-wheat, you may need less flour. if you’re going 100% all-purpose, you may need a bit more.

  • chia seeds - rich in omega-3 fatty acids, antioxidants, fiber, magnesium, B vitamins, and more, these little seeds pack a punch! I love them in this recipe because they add a little crunch, and help to hold the cookie together.

  • dates - the raisin’s hotter, healthier twin sister. kidding, mostly. but seriously dates are SO GOOD. they’re ugly, I know, but they’re soft and sweet and caramelly, and packed with fiber, potassium, iron, and more!

  • chocolate chips - no explanation or justification needed.

RECIPE:

2 extra ripe bananas, mashed
1 extra large egg
½ cup butter
¼ cup maple syrup or honey 
1 tsp vanilla extract 
1 ½ cup rolled oats 
1 cup whole-wheat pastry flour 
3 tbsp chia seeds 
½ tsp baking soda 
½ tsp salt 
½ tsp cinnamon
Pinch of ginger
4 medjool dates, pitted, finely chopped 
½ cup dark chocolate chips 

  1. Start by browning the butter. In a small saucepan over medium-low heat, melt the butter and stir gently. Keep an eye on it, as this process can happen quickly. You’ll notice the butter start to foam, and turn from a pale yellow, to golden, to amber. Stir consistently to pick up the brown bits from the bottom of the pan. Once the majority of the butter is an amber color, immediately turn off the heat and pour the butter into a bowl and cool completely. 

  2. In a large mixing bowl, combine the mashed bananas with the egg, maple syrup, and vanilla extract. Add the cooled butter and mix until combined. Set aside. 

  3. In a separate bowl, stir together the dry ingredients: the oats, flour, baking soda, salt, and spices. Next, add the chopped dates and stir to coat in the dry ingredients (essential to prevent sticking). 

  4. Fold the dry ingredients to the wet in two batches. Add the chocolate chips and stir until just combined. Cover and refrigerate for at least 30 minutes. 

  5. When ready to bake, preheat the oven to 350F and line a baking sheet with parchment paper. Use a small cookie scooper to scoop the dough onto the sheet, 10-12 per batch. Bake for 11-13 minutes and cool completely before removing from the sheet. They will continue to bake on the sheet after being removed from the oven, so they need to stay for a few extra minutes. 

  6. While they cool, place a few extra chocolate chips on top of each cookie, if desired! 

  7. Enjoy! Store leftovers in an airtight container in the fridge for up to 10 days. If you keep them at room temp, they will only last for up to a few days.

The BEST Brown Sugar Brown Butter Chocolate Chip Cookies

Haley HansenComment

WHAT’S INSIDE:

  • browned butter - it’s not “brown butter” though I understand that the title totally misleads you. browned butter is traditional butter that has been cooked down to evaporate the water and caramelize the milk solids, creating this gorgeous liquid-gold rich, nutty butter. this is what takes these cookies to a whole new level.

  • brown sugar - unlike white granulated sugar, brown sugar actually still contains a small amount of molasses. have you noticed how the brown sugar tends to clump and stick together while white sugar doesn’t? that’s the molasses adding stickiness to the brown sugar. and it adds a delicious deeper flavor and moisture to these cookies.

  • flour - yup, just plain ol’ all-purpose flour here. nothin’ fancy.

  • chocolate chips - go crazy here. there’s no such thing as too many chocolate chips. you can use dark, milk, or a combination of the two.

  • salt - salt! essential. cookies are sweet, and salt helps to both enhance that sweetness, as well as the other prominent flavors in this recipe specifically, and balance out each flavor.

RECIPE

1 ½ sticks unsalted grass-fed butter (¾ cup)
1 cup dark brown sugar, packed 
1 large pasture-raised egg, room temperature 
2 tsp vanilla extract 
1 1/2 cup + 2 tbsp. all-purpose flour OR 1 ½ cup + 1 tbsp whole-wheat pastry flour 
1 teaspoon baking soda 
¾ teaspoon sea salt 
½ teaspoon ground cinnamon 
⅔ cup dark chocolate chips, plus extra for topping 

  1. Brown the butter. In a small skillet or saucepan, slowly over medium heat, melt 1 stick (½ cup) of butter. Chop the remaining ½ stick (¼ cup) of butter into small cubes. Reduce the heat and stir the butter, scraping down the sides of the skillet. Watch as the butter turns from yellow to light gold to amber, and some foam appears. Continue stirring until you see little brown specs in the bottom of the skillet. Turn the heat off completely, remove the skillet from the heat, and stir in the cubed butter. Set aside and cool to room temperature. 

  2. Combine the dry ingredients in a small bowl - the flour, baking soda, sea salt, and cinnamon. Stir in the ⅔ cup chocolate chips and set aside. 

  3. When the butter has cooled, mix the wet ingredients. In a large bowl, whisk together the butter, sugar, egg, and vanilla extract until smooth. Working in batches, add the dry ingredients to the wet and mix after each addition until all the dry ingredients are incorporated. Cover the bowl tightly with a lid or plastic wrap and refrigerate for 20 minutes, or until slightly firm. 

  4. Line a baking sheet with parchment paper. Using a 2-ounce cookie scoop, scoop portions of the dough onto the baking sheet and cover with plastic wrap (reuse what you used before!). Refrigerate again for 40 minutes. 

  5. When you’re ready to bake, preheat the oven to 350F. Space the cookies with 2 inches between each portion on the baking sheet. Transfer the rest of the dough to a ziploc bag or airtight container until ready to bake. Bake for 9 minutes, then remove from the oven and place a few extra chocolate chips on top of each cookie, and place them back in the oven for 1-2 more minutes. The edges should be golden and the centers gooey. Let them cool completely on the baking sheet - this is where they finish baking, so don’t remove them before they’ve cooled! 

  6. Serve immediately, and store the rest in an airtight container at room temperature for up to 2 weeks. Remaining dough can be stored in an airtight container in the fridge for up to 2 weeks, or in the freezer for up to 12 months. 

  7. Enjoy! 

The Best Cashew Chicken Stir-Fry

Haley HansenComment

WHAT’S INSIDE:

  • boneless, skinless chicken breast (or thigh) - a high-quality versatile protein source! take your pick between breast or thigh - it’s totally up to you. just make sure you’re using boneless, skinless. I wouldn’t recommend leaving this out, as the protein is essential for appetite and blood sugar regulation, muscle protein synthesis, and more.

  • peppers and broccoli - fiber, micronutrients, delicious flavor and the perfect crunch! add some color and antioxidants to this dish with red, yellow, or orange bell pepper, and green broccoli (I think it’s always green).

  • cashews - a fantastic source of monounsaturated fats! the cashews in this dish, though I don’t know where they came from, are essential. again, I don’t know why, but they just are. don’t leave them out (unless you’re allergic, of course)!

  • soy sauce // tamari - which to choose?? well, if you prefer to or need to limit the gluten in your diet, tamari is probably the best option for you. if gluten isn’t an issue, traditional soy sauce will do just fine. either way, I’d recommend seeking out the low-sodium or reduced-option - boy, can the sodium add up real quick!

  • rice // cauliflower rice - which to choose? if you’re looking to bump up your carbs (or hate cauliflower), traditional rice of any variety is probably your best pick. if you’re looking to reduce your carbs (or don’t feel like cooking a pot of rice), cauliflower rice is probably your best pick! thankfully, you should be able to find fully-cooked, frozen versions of either option at your local grocery store. I know for a fact that good ol’ TJ’s carries both.

RECIPE

1.25 lbs boneless skinless chicken breast, cubed into 1” pieces
2 cups chopped red bell peppers (about 2 peppers)
2 cups chopped broccoli florets (about 1 medium head)
2 garlic cloves, minced
⅓ cup lightly salted cashew pieces
1 teaspoon olive oil
Salt and pepper, to taste
3 tablespoons low-sodium soy sauce or tamari
3 tablespoons sweet or spicy chili sauce
1 tablespoon rice vinegar
1 teaspoon honey
1 teaspoon sesame oil
1 teaspoon water
½ teaspoon flour
Cooked rice or cauliflower rice, for serving
Chopped green onion, for garnish
Sesame seeds, for garnish

  1. Heat a large nonstick skillet over medium heat and coat with the olive oil. Add the broccoli and season with a dash of salt. Cook until slightly tenderized, or about 5 minutes. You can add about 1 tablespoon of water to the skillet to help tenderize the broccoli.

  2. Next, add the bell pepper with another dash of salt, and continue cooking until the bell pepper softens, or about 3-4 minutes. Transfer the veggies to a plate or bowl while you cook the chicken.

  3. Add the chicken to the skillet with a dash of salt and cook until seared all around and the internal temperature of the thickest pieces reaches 165F. Add the minced garlic and veggies back to the skillet and stir.

  4. Whisk together the soy sauce, sweet chili sauce, rice vinegar, honey and sesame oil in a small bowl until combined. Add the water and pour the sauce into the skillet over the chicken and veggies. Stir in the cashews, as well.

  5. Sprinkle the flour over everything and stir well. Let the sauce come to a simmer, stirring occasionally. Once simmering, turn the heat off and allow the skillet to sit for 1-2 minutes.

  6. While you wait, prep the bowls. Add rice or cauliflower rice to 4 bowls and then lay the cashew chicken over the top. Garnish with green onion and sesame seeds and enjoy!

  7. Store leftovers in an airtight container in the fridge for up to 4 days.

Easy Enchilada Bake

Haley HansenComment

WHAT’S INSIDE:

  • lean ground beef (grass-fed) - there’s just something about a rich, high-quality red meat that pairs so well with a mildly spicy enchilada sauce. sure, you could swap in ground turkey or chicken, but… it’s not the same. opt for the grass-fed and grass-finished for the most nutrient-dense ground beef.

  • peppers, onions, garlic - the holy trinity. also, fiber and micronutrients :)

  • enchilada sauce - red is a must! but that’s just my opinion, so you can find your favorite. usually, I’d recommend seeking out a low-sodium version, if you can find it.

  • tortillas - again, use your favorite here! I’ve linked my favorite in the recipe below. one of the best things about this recipe is that it doesn’t require you to roll the contents up in a tortilla, so you don’t have to worry about the tortillas cracking (ahem, corn tortillas). everything is conveniently piled in neat little layers.

  • cheese - if you’re looking for a dairy-free recipe, this one can certainly be that for you. I’m a cheese-lover, but I did try this without cheese, and it was still delicious!

  • toppings - essential. Greek yogurt, avocado, cilantro, and a dash of hot sauce are my favs!

RECIPE

2 lbs lean ground beef (85% or higher)
3 medium-size bell peppers, diced 
1 small white onion, peeled and diced
3 garlic cloves, peeled and minced 
1 tbsp olive oil 
1 packet of taco seasoning 
Salt, to taste 
1 15-oz jar of enchilada sauce 
Your favorite tortillas (I love the Siete Cassava Flour tortillas)
Shredded cheddar cheese, if desired 
For serving: 
Avocado or guacamole 
Greek yogurt
Fresh cilantro 

  1. Start by cooking the meat. Heat a large nonstick skillet with about ½ tablespoon of olive oil over medium heat. Add the ground beef and use a wooden spoon or spatula to break it up into smaller chunks. 

  2. Once just about cooked through, add the taco seasoning with a splash of water and stir to coat the meat. Cook for 2-3 additional minutes and then taste, and salt as needed. Remove from heat, transfer the meat to a bowl and set aside. 

  3. In the same skillet over medium heat, add the diced bell peppers and cook for 2-3 minutes. Add the onion and garlic and continue cooking until the veggies are just browned and a little tender. Remove from heat, transfer to a bowl and set aside.

  4. Preheat the oven to 425F and lightly grease a 9x13 baking dish with avocado oil or butter. 

  5. Start by coating the bottom of the baking dish with just enough enchilada sauce to cover the surface. Place a layer of tortillas over the top. You can tear your tortillas into various shapes as needed to cover as much of the baking dish as possible. 

  6. Spread another thin layer of enchilada sauce over the top of the tortillas. Add a layer of ground beef, followed by veggies, and then shredded cheddar. Repeat this layering process until you’ve filled your baking dish. 

  7. Bake at 425 for about 18 minutes. Remove the dish from the oven and top with an additional thin layer of shredded cheddar cheese. Turn the oven to broil and cook for another 3-4 minutes, or until just browned and crispy around the edges. 

  8. Remove from the oven and cool slightly for 5-8 minutes before serving. Enjoy! 

Healthier Classic Apple-Crisp (and you'd never know!)

Haley HansenComment

WHAT’S INSIDE:

  • apples (duh) - the apples are THE star of the show here, so pick high-quality apples. hunt them down at your local farmers’ market or apple orchard if you have to!

  • oats - oats contribute to the “crisp” of an apple crisp. bonus: they’re high in fiber and protein! make sure to pick old-fashioned rolled oats, not quick-cooking oats.

  • brown sugar - what makes brown sugar so special and arguably irreplaceable is the presence of molasses - this brings a deep, rich flavor and a little extra moisture to the crisp. it’s perfect!

  • pumpkin pie spice - I mean… is there any other spice used more in the fall months? pumpkin pie spice makes elevating the flavor of fall goodies so simple.

RECIPE

For the topping:
½ cup rolled oats (not steel-cut)
¼ cup flour (oat, whole-wheat, or white will work)
¼ cup cold butter, cut into very small cubes
2 tbsp brown sugar
½ teaspoon pumpkin pie spice
Pinch of salt
¼ cup chopped nuts, optional

For the apples:
3 medium-large honeycrisp apples
2 tbsp brown sugar
1 tsp pumpkin pie spice
Juice from ½ lemon
Pinch of salt

  1. Preheat the oven to 350F and lightly grease an 8x8 baking dish with oil or butter.

  2. Cut the apples into thin slices, removing the core. Then dice into small cubes and toss into a large mixing bowl with the brown sugar, spices, and lemon juice. Mix well and then set aside for 5-10 minutes.

  3. In a smaller bowl, stir together the rolled oats, flour, brown sugar, spices, and salt (and nuts, if using). Next, add the small cubes of butter and work the butter into the dry ingredients using your hands until the pieces are about pea-sized and well-coated in the dry ingredients.

  4. Dump the apples into the baking dish and spread into an even layer, making sure as little of the dish shows through. Finally, sprinkle the crumble topping over the apples in an even layer.

  5. Bake for 45-55 minutes, or until the apples are very tender and the crumble has a golden color to it. Let sit to cool for at least 10 minutes before serving.

  6. Serve immediately with ice cream as a dessert, yogurt for breakfast, or on its own!

  7. Store leftovers in an airtight container in the fridge for up to 7 days.

Easy Meal-Prep Breakfast Sandwiches

Haley HansenComment

WHAT’S INSIDE:

  • pasture-raised eggs - pasture-raised chickens are free to roam and feed on healthy land, and can lay eggs that are higher in omega-3 fatty acids and other nutrients than non-pasture-raised chickens. we’re using the WHOLE egg because yolks are loaded with high-quality protein, omega-3’s, choline, vitamin D, and cholesterol.

  • Greek yogurt - adding protein, calcium, and vitamin D to boost the nutrient-density. the creamy tangy yogurt also helps to bulk up the egg mixture without adding much fat and calories.

  • cheddar cheese - because good sharp cheddar cheese takes eggs for breakfast to a whole ‘nother level. in my opinion, an egg sandwich is incomplete without cheddar. use any kind of cheese you like, though.

  • bacon - BACON. I’m actually not cray about bacon (too salty), but I do enjoy it occasionally and it’s really good on these sandwiches. center-cut bacon tends to be lower in fat, so when I buy bacon, I buy that!

  • bagels // english muffins - take your carb pick! bagels tend to come loaded with a hefty handful of carbs, so be smart about that if a bagel is your preference. english muffins make for a bit of a lighter sandwich.

RECIPE

12 pasture-raised eggs
⅓ cup low-fat Greek yogurt
2 oz sharp cheddar cheese, shredded
Salt and pepper, to taste
Spinach
Whipped cream cheese
Turkey bacon (or regular center-cut), optional
9 bagels or english muffins

  1. Preheat the oven to 400F and lightly grease a 9x9 baking pan with cooking oil.

  2. In a large mixing bowl, whisk the eggs and sour cream until smooth, then add the shredded cheese and mix again. Season with salt and pepper. Pour the egg mixture into the 9x9 baking pan, and bake at 400F for about 18-20 minutes, or until the center is just set and the edges are barely golden brown.

  3. While the eggs bake, prepare the bacon. Lay 9 slices of bacon, if using, on a rimmed baking sheet with about 1 inch between each slice. Bake for about 12 minutes, or until your desired done-ness. Transfer to a paper towel to drain some of the grease.

  4. As the egg bake cools, toast the bagels/english muffins in the oven or toaster to your desired done-ness. Spread one tablespoon of whipped cream cheese on each half, followed by a small handful of spinach on just one half. Tear each slice of bacon in half, and lay both halves on top of the spinach stack.

  5. Slice the egg bake into 9 squares. Use a spatula to pull them out of the pan and place them on top of the bacon. Finally, close each sandwich with its matching half.

  6. Wrap each sandwich tightly in plastic wrap and refrigerate for up to 5 days, or freeze for up to 3 months.

  7. When ready to serve, simply unwrap and re-heat the sandwich in a toaster oven or microwave until warm. Enjoy!

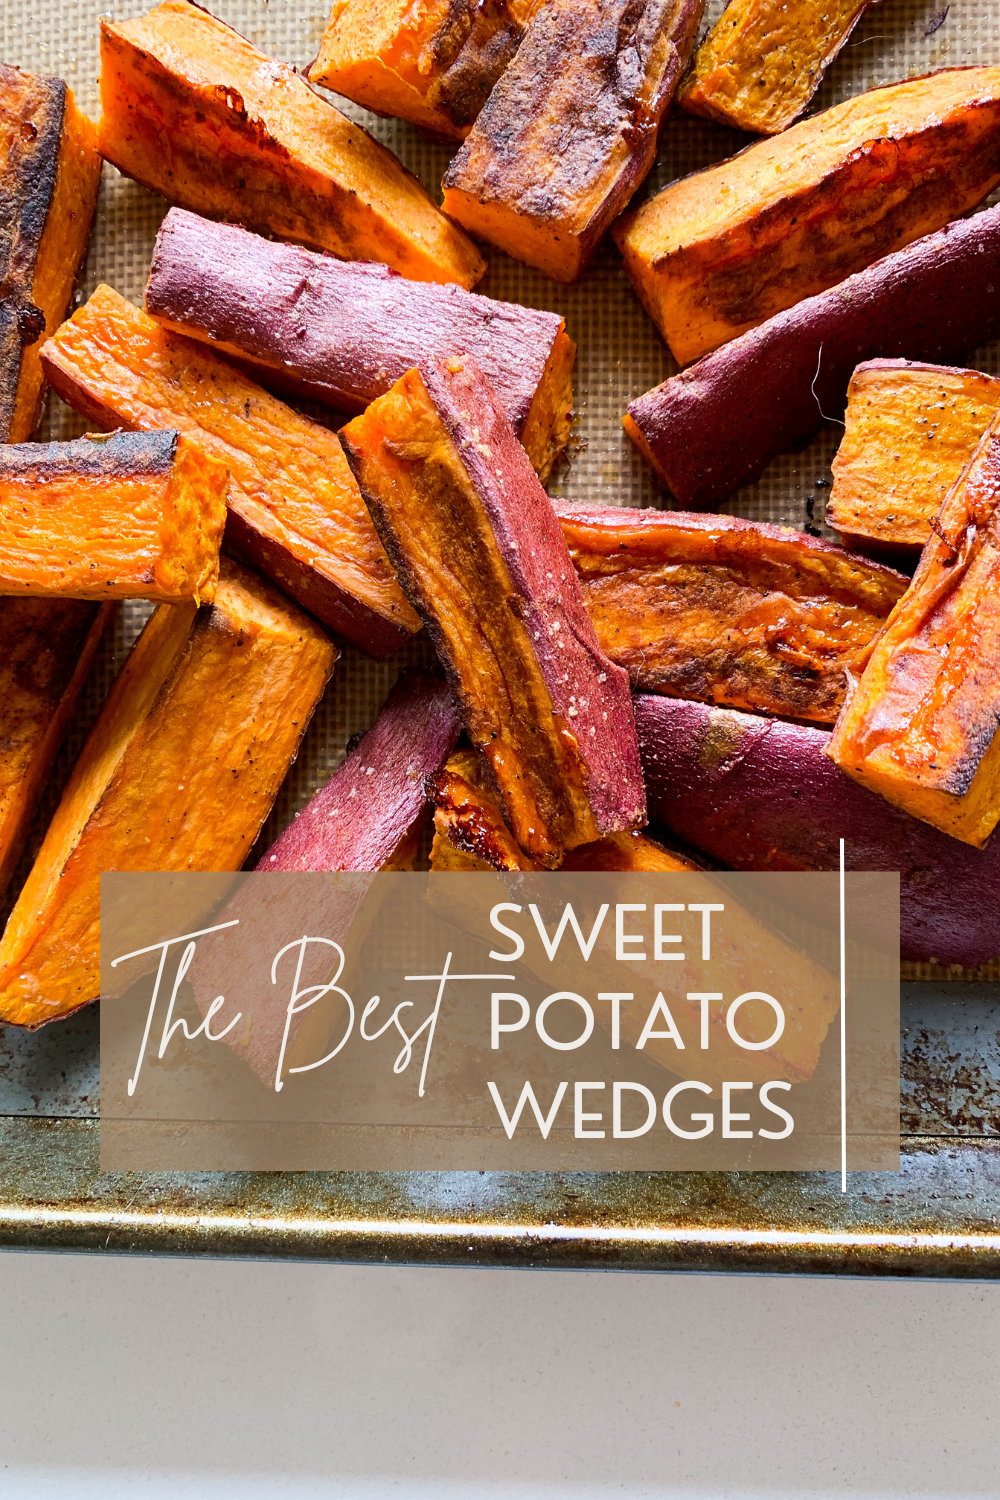
The Best Sweet Potato Wedges (with a homemade aioli!)

Haley HansenComment

WHAT’S INSIDE:

  • sweet potato - the most delicious of all potatoes, in my opinion. the sweet potato is a bit more nutrient dense than other potatoes - containing more vitamin A, vitamin C, beta-carotene, and fiber. it’s also more flavorful and fun! in this recipe, we’re balancing the sweetness of the potato with a tangy, garlicy aioli. yum!

  • avocado oil - the best oil to use for high-heat cooking (any temp greater than 350F) because of its high smoke point. read more about cooking oils here!

RECIPE

Sweet Potato Wedges:
2 large sweet potatoes, about 2-2.5 lbs total)
2 tablespoons avocado oil
1 teaspoon sea salt
1 teaspoon fresh cracked black pepper

Simple Homemade Aioli:
1/4 cup mayonnaise (I recommend brands that use olive oil or avocado oil)
1 small garlic clove
1 teaspoon fresh lemon juice
Fresh cracked black pepper

  1. Preheat the oven to 450F and line two baking sheets with parchment paper.

  2. Wash , scrub, and dry the potatoes. Cut the ends off, then slice them in half crosswise. Place the flat portion on the cutting board and slice from top to bottom to form thick wedges. I kept mine about the size of my thumb, maybe a little bigger. The wider the wedges, the longer the roasting time - keep that in mind.

  3. Spread the wedges on the baking sheet in one even layer and drizzle the olive oil over the top. Use your hands or a cooking brush to coat each wedge on all sides with oil. This is very important to ensure a soft, yet crispy and evenly cooked texture all around, and to ensure that the seasoning adheres to each wedge. Season with salt and pepper, and toss to combine.

  4. Roast for 30 minutes, flipping the wedges halfway through. Rotate the pans at this point, as well - top to bottom and bottom to top, and front to back and back to front - since the back of the oven tends to stay hotter than the front.

  5. While the wedges cool, make the aioli. Whisk together the mayo and lemon juice, and then grate in the garlic clove using a small mandolin or cheese grater and whisk again.

  6. Serve wedges with the aioli immediately. Leftover wedges will last in an airtight container for up to one week, and leftover aioli will last until dated on the mayo bottle.

  7. Enjoy!

Buffalo Cauliflower Wings (baked!)

Haley HansenComment

WHAT’S INSIDE:

  • cauliflower - star of the show, as always. cauliflower is subbing in for what would typically be chicken. I don’t follow a vegetarian or vegan diet, but this sub is a great way to get in an additional serving of veggies, and to make a traditionally high-calorie dish lower calorie. and fun!

  • all-purpose and whole-wheat flour - this combination makes up the coating for the cauliflower nuggets. we’re using half AP and half WW for the best balance of tender, crispiness and a bit of a hearty chew and nutty flavor.

  • low-fat milk - another important component of the coating, the milk adds a tanginess and helps to bind the coating. I haven’t tried a plant-based milk for this recipe but you certainly could, if you want!

  • Greek yogurt - the dip! the dip is always essential. we’re using Greek yogurt here for a couple reasons: 1) flavor; 2) protein, probiotics, calcium, vitamin D; and 3) lower calorie substitute for what would otherwise be sour cream. make sure to buy plain yogurt with no sugar or flavors added!

  • mayo - to prevent the dip from being overly tangy and thick, we’re adding a touch of mayo, as it helps to balance both the flavor and texture. I like the olive oil version from Kraft, but feel free to use any kind you like!

  • blue cheese - I’m a biiiiiiig blue cheese gal, so that’s the purpose for this. take it or leave it.

RECIPE:

Cauliflower wings:
1 medium head of cauliflower
¾ cup all-purpose flour
¼ cup whole-wheat flour
1 cup low-fat milk
¼ cup water
1 tsp. salt
½ tsp. garlic powder
½ tsp. fresh cracked black pepper
~¾-1 cup buffalo wing sauce (Noble Made is my favorite)

Blue cheese dip:
⅓ cup Greek yogurt
1/4 cup mayo
¼ crumbled blue cheese
Salt and pepper, to taste
Fresh chives or parsley, for garnish

  1. Preheat the oven to 425F and line a baking sheet with parchment paper or a silicone baking mat.

  2. Whisk together the dry ingredients in a mixing bowl. Add the buttermilk and water and whisk again until smooth. It should be just thinner than pancake batter, so add water or buttermilk as needed until you reach this consistency. Set aside.

  3. Chop the cauliflower into small florets, keeping them as equally sized as possible. Dip each floret into the wet mixture and tap gently on the side of the bowl to remove some of the mixture.

  4. Transfer to the baking sheet and bake for 20 minutes. Remove from the oven and cool slightly.

  5. Pour buffalo sauce into a small, flatter bowl and dip each floret into the buffalo sauce, tossing to coat each piece. Transfer back to the baking sheet and bake for 12 more minutes. Broil on high for 3-4 more minutes, or until crisp around the edges.

  6. While the cauliflower bakes, prepare the dip. Stir together all ingredients in a small bowl until combined. Season with salt and pepper as needed and garnish with chopped fresh herbs.

  7. Serve immediately, and enjoy!

Pumpkin Chocolate Chip Muffins (blender recipe!)

Haley HansenComment

WHAT’S INSIDE:

  • pumpkin puree - the main character! pumpkin is a great addition to baked goods to boost the nutrient content and flavor with minimal calories. it’s rich in vitamins A, K, and E, as well as magnesium, phosphorous, zinc, and fiber. make sure to purchase the unsweetened version!

  • rolled oats - used as a flour substitute to make this recipe easily gluten-free. who doesn’t have oats on hand at all times?? plus, oats are a nutrient-dense carb source - rich in fiber, protein, and B vitamins.

  • Greek yogurt - adds a little tang, and a rich creamy binding agent with tons of protein, calcium, and vitamin D. Greek yogurt is used as a replacement for what would otherwise be sour cream or whole milk.

  • honey / coconut sugar - to sweeten and add a touch of moisture, we use honey and coconut sugar instead of granulated sugar. at the end of the day, sugar is sugar - yes - but these sources can be less highly processed (meaning they maintain a few more important nutrients) and yield a deeper, more caramelized flavor to the recipe.

  • butter - a classic. we use butter in this recipe because it lends such a distinct flavor - one of my favorites, actually. it can easily be swapped for coconut oil, though, if needed.

RECIPE:

2 cups old-fashioned rolled oats
1 ½ teaspoons baking powder
½ teaspoon baking soda
1 teaspoon pumpkin pie spice
Extra dash of cinnamon
½ teaspoon sea salt
2 eggs
1 cup pumpkin puree (not pumpkin pie filling)
⅔ cup plain Greek yogurt
¼ cup coconut sugar
1 tablespoon honey
2 tablespoons melted butter
1 cup dark chocolate chips

  1. Preheat the oven to 425F and line a muffin tin with parchment cups.

  2. Add the oats to a high-powered blender and pulse until finely ground into the texture of flour (or as fine as you can make it).

  3. Next, add the baking powder, baking soda, pumpkin pie spice, cinnamon and salt and pulse again a few times to mix.

  4. Finally, add the eggs, yogurt, coconut sugar, honey, and melted butter to the blender and blend on high until smooth and no clumps of flour remain. You may need to use a rubber spatula to periodically scrape down the sides of the blender.

  5. Remove the blade (if possible) and stir in the chocolate chips. If you cannot remove the blade, pour the chocolate chips into the blender and pulse just a couple times to incorporate.

  6. Pour the batter into the muffin tin, dividing it evenly amongst all 12 cups.

  7. Bake at 425F for 8 minutes, then reduce the temperature to 350F and continue baking for another 8 minutes, or until the edges are golden brown and a toothpick poked through the center comes out almost completely clean.

  8. Remove from the oven and cool on the counter for at least 30 minutes. Enjoy immediately, and store leftovers in an airtight container in the fridge for up to 2 weeks. Simply gently reheat when ready to enjoy.

Meal-Prep Breakfast Burritos (freezer-friendly!)

Haley HansenComment

WHAT’S INSIDE:

  • eggs - one of the highest quality sources, eggs can definitely be deemed a “superfood”, if that’s your thing. they’re full of high-quality protein, healthy omega-3 fats (if you buy organic + pasture-raised), choline, and more.

  • cottage cheese - if you’ve never scrambled your eggs with cottage cheese, NOW is the time! they turn out so fluffy and smooth, and are packed with a whopping 15 more grams of high-quality protein!

  • cheddar cheese - well, of course. is a breakfast burrito complete without at least a little bit of cheese? pick any kind you like, but I love sharp cheddar.

  • spinach / peppers / onions - fiber and flavor! adding low-starch vegetables to breakfast is a great way to boost fiber intake right away. quickly saute these for a juicy crunch and a bit of sweetness!

  • tortillas - pick your favorite! any tortilla large enough to wrap will work here. my favorite is the Siete Grain-Free Burrito Size Tortilla, but feel free to use any tortilla you like.

RECIPE:

8 large eggs
2/3 cup low-fat cottage cheese
1/4 cup shredded cheddar cheese
2-3 cups of spinach
2 bell peppers, thinly sliced lengthwise
1/2 yellow onion, thinly sliced
1 whole avocado, thinly sliced
Salt and pepper, to taste
4 burrito-size flour tortillas (I love Siete Grain-Free Burrito Size Tortillas)
For serving (optional):
Salsa
Sour cream or Greek yogurt
Hot sauce

  1. Heat a large nonstick skillet over medium heat, add about 1/2 tablespoon oil and swirl to coat.

  2. Add the sliced peppers and onions, season with salt and pepper, and saute until just charred on the edges. Reduce the heat to low and stir in the spinach until wilted. Transfer to a plate to cool.

  3. Whisk the eggs egg whites, and about 1/2 of the shredded cheese until combined, and season with salt and pepper. Add just a dash more oil to the skillet and swirl. Pour in the whisked eggs and use a rubber spatula to gently scramble the eggs as they cook. Once cooked, transfer to a plate to cool.

  4. Assemble the burritos. Lay 4 tortillas flat on your counter top and sprinkle a handful of the remaining shredded cheese onto the center of each tortilla, slightly offset to one side. Next, add the scrambled eggs, followed by the veggies, and finally, the avocado slices.

  5. Fold the shorter side over the filling, then fold sides over the top and roll tightly into a burrito.

  6. Heat the skillet once again over medium heat and add the burritos seam side down into the skillet. Cook for about 2 minutes, then flip and cook for another 2 minutes.

  7. Remove from the skillet and wrap tightly in plastic wrap, then store in the fridge or freezer until ready to eat. Reheat in the microwave or toaster oven until desired temperature is reached. Enjoy!

The Best Simple Kale Salad

Haley HansenComment

WHAT’S INSIDE:

  • organic kale - kale! rich in fiber, potassium, vitamins C and K, antioxidants, and more, this leafy green is packed with nutrition. because of its tough texture and bitter flavor, you might not be in love with it yet, but after trying this salad, you will be!

  • extra virgin olive oil - sometimes referred to as “liquid gold”, extra virgin olive oil is a high-quality fat source that can help reduce inflammation, protect and enhance the skin, and more. EVOO is rich in vitamins E and K.

  • apple cider vinegar - this tangy addition helps to brighten the flavor of the dressing, and has been shown to positively impact cholesterol and glucose levels!

  • goat cheese - because everything is better with goat cheese.

RECIPE

1 bunch chopped organic kale leaves, washed & dried (any kale you like)
2 green onions, chopped
3 tbsp extra virgin olive oil
1/2 tbsp pure maple syrup
1/2 tbsp spicy brown mustard
1/2 tbsp apple cider vinegar (with “the mother” for enzymes and probiotics)
salt & pep to taste
crushed red pepper flakes, optional
crumbled goat cheese, optional

1. Make the dressing. Add the oil, maple syrup, vinegar, & seasoning to a mason jar. Screw on the lid and shake vigorously until smooth.
2. Add the chopped kale to a large bowl & pour the dressing over the top. Use your hands to run the dressing into the kale leaves for about 2 minutes. The leaves should tenderize and turn a bright green color!
3. Add the chopped green onion & goat cheese, if using.
4. Serve immediately & enjoy! Salad should keep for up to 4 days in the fridge.

Peanut Butter Brownie Banana Bread

SnacksHaley HansenComment

WHAT’S INSIDE:

  • bananas (obviously) - major source of potassium and slow-digesting carbohydrates. also kind of the backbone of a good banana bread.

  • peanut butter - rich, creamy, peanutty flavor. always buy the unsweetened version with only peanuts and salt on the ingredients list!

  • Simple Mill Brownie Mix - the BEST healthier brownie mix on the market. made with 7 simple (no pun intended) ingredients, including almond flour, coconut sugar, and flaxseeds for a minimally processed, nutrient-dense sweet treat.

RECIPE

2 small extra ripe bananas
2 eggs 
½ cup natural creamy peanut butter 
1 box Simple Mills Brownie Mix 
dark chocolate chips, optional (but highly recommended

  1. Preheat the oven to 350F and line a 9x5 loaf pan with parchment paper. 

  2. In a large bowl, mash the banana with the egg and peanut butter. Once smooth, add the brownie mix and stir until well combined and no lumps remain. 

  3. Pour the batter into the loaf pan and top with additional dark chocolate chips, if desired. 

  4. Bake at 350F for about 45-48 minutes, or until a toothpick poked through the center comes out clean. 

  5. COOL COMPLETELY before slicing. I let mine cool overnight (I know, I know) before slicing and it was perfect. Worth the wait!

  6. Store in an airtight container in the fridge for up to 1 week or in the freezer for up to 3 months. Enjoy! 

Mediterranean Chicken Bowls with Home Fries

Main MealsHaley HansenComment

WHAT’S INSIDE:

  • boneless, skinless chicken breast - PROTEIN!

  • yellow potatoes - CARBS! in the best form :)

  • romaine, cabbage, and spinach - some non-starchy colorful veggies for micronutrients and fiber.

  • goat or feta cheese - tangy semi-soft cheese to add a little creaminess, healthy fats, protein, and calcium. for most people - even those with dairy difficulties, goat or feta cheese can be easier to digest.

  • olive oil - that’s right, we’re making our own dressing! most store-bought dressings are made with more grain and seed oils than olive oil.

RECIPE

For the bowls:
1lb boneless skinless chicken breasts
2 lemons
3 cloves garlic 
2 teaspoons dried oregano
1 teaspoon dried basil 
3 tablespoons olive oil, divided 
4 medium yellow potatoes 
Salt and pepper 

For the salad:
2 cup chopped romaine 
2 cups chopped purple cabbage 
1 cup chopped spinach
1 small cucumber, diced 
¼ cup finely diced red onion
½ cup fresh parsley, finely chopped 
Juice from 1 full lemon 
3 tablespoons olive oil 
1 teaspoon dijon mustard 
1 teaspoon honey 
Salt and pepper to taste 
Crumbled goat or feta cheese, for garnish
Optional:
Kalamata olives
Roma tomatoes, chopped 
Pine nuts

  1. Begin by marinating the chicken. In a large airtight container, add the chicken breasts. Squeeze the lemon juice over the top, then add the olive oil, dried herbs, garlic, and salt and pepper. Shake until the breasts are coated with the marinade. Refrigerate for 4-12 hours. 

  2. Prep the potatoes. Wash, scrub, and dry each potato. Slice into wedges or fries, and set aside. 

  3. Bring a large pot of lightly salted water to a boil. Add the sliced potatoes and cook until just tender, about 8-10 minutes. Drain in a colander and set aside. 

  4. Next, cook the chicken. Heat a large skillet over medium heat and coat with 1 tablespoon olive oil. Add the chicken breasts and some of the remaining marinade and cook for about 6-7 minutes on each side, or until the internal temperature reaches 165F. Transfer to a plate and set aside.

  5. Rinse the skillet or use a new one for the potatoes. Heat the skillet over medium and coat with the remaining tablespoon of olive oil. Add the potatoes and cook until charred on each side, and completely tender in the center. This took about 8-10 minutes for me, flipping each wedge every couple of minutes. Transfer to a plate and set aside. 

  6. Make the salad. Toss the romaine, cabbage, spinach, cucumber, red onion, &fresh chopped parsley in a large bowl. whisk together the lemon juice, olive oil, mustard, honey, & salt and pepper in a small bowl until smooth. Drizzle over the greens & toss to combine. If using the kalamata olives, tomatoes,&/or pine nuts, add them now. 

  7. Time to serve! plate the chicken & potatoes next to the salad &garnish with goat or feta cheese, if desired. 

  8. Store leftovers in an airtight container in the fridge for up to 5 days. Enjoy! 

Easy Air-Fried Salmon (crispy and juicy!)

Main MealsHaley HansenComment

WHAT’S INSIDE:

  • wild-caught sockeye salmon - this type of salmon is much less fatty than the more widely known farmed Atlantic salmon, but the omega-3 to omega-6 ratio is much healthier. additionally, wild-caught sockeye salmon is free of toxins and antibiotics, unlike its counterpart.

  • avocado oil - we’re cooking this fish quickly at almost 400 degrees Fahrenheit, so we want an oil with fatty acids that can handle that heat!

RECIPE:

16 oz wild-caught sockeye salmon
1 tablespoon avocado oil
your favorite seasoning
lemon wedge and cilantro, for garnish (optional)

  1. Turn your air-fryer on to “Air Fry” at 375F. Lightly brush with avocado oil.

  2. Cut your salmon into 4oz portions, brush with avocado oil, and season as desired. Salt and pepper make for a delicious simple seasoning that leaves room for creative flavoring elsewhere, like hummus or avocado or your favorite healthier dressing.

  3. Lay the salmon filets into the air fryer - two at a time, if needed, to prevent over-crowding - and fry for 15-18 minutes or until crispy on the outside and at least 125F on the inside.

  4. Remove from the air fryer, cool slightly, and garnish with lemon and cilantro, if using.

  5. Serve immediately and enjoy! Store leftovers in an airtight container for up to 4 days.

Salted Chocolate Protein Shake

BreakfastHaley HansenComment

WHAT’S INSIDE:

  • frozen banana - helps to thicken the smoothie and adds a few carbs for enhanced recovery and glycogen replenishment.

  • Fage 2% Greek yogurt (plain) - helps to thicken the smoothie and adds protein and calcium for enhanced recovery and muscle repair.

  • Dymatize Iso100 Gourmet Chocolate - high-quality protein supplement with essential amino acids for optimal muscle tissue repair, and incredible flavor!

  • Vital Proteins Collagen Peptides - collagen peptides are the backbone of healthy, youthful skin, hair, and nails. they help bump up the high-quality protein content, too!

  • LMNT Chocolate Salt electrolyte mix - electrolytes are so important after a workout, especially a sweaty one! sodium, potassium, and magnesium play a crucial role in muscle contraction and relaxation, fluid balance, heart function, and so much more. replenish with these delicious electrolyte drink mixes!

RECIPE:

1 frozen banana
80-100g Fage 2% plain Greek yogurt
1 scoop Dymatize Iso100 Gourmet Chocolate whey protein
1 scoop VItal Proteins Collagen Peptides
1 LMNT Chocolate Salt electrolyte drink mix
4oz cold water
2 handfuls of ice
1 handful of Purely Elizabeth Chocolate Sea Salt granola (optional)

  1. Add all ingredients to a high-powered blender. Blend, stopping to scrape down the sides as needed. And enjoy!

Nourishing Nutritious Banana Bread

Snacks, BreakfastHaley HansenComment

A hug in a loaf, this healthier Nourishing Nutritious Banana Bread is tender and moist, packed with rich dark chocolate, and the best kind of comfort food!

WHAT’S INSIDE:

  • extra ripe bananas: kind of essential. the start of the show, with the chocolate chunks coming in close behind.

  • collagen peptides: protein! beneficial for skin, hair, nails, and joints, and a seamless, nutritious, flavorless addition to this recipe.

  • almond flour: free of refined grains and gluten, rich in healthy fats. keeps the bread tender and moist!

  • rolled oats: to add a bit of a bite to the recipe, and because I love anything that reminds me of an oatmeal chocolate chip cookie. the perfect partner for banana bread!

  • dark chocolate chunks: emphasis on the chunks! roughly chopped dark chocolate melts beautifully into this loaf.

  • Greek yogurt: rich in calcium and protein. lends a tenderness to the texture and ever-so-slight tanginess to the flavor.

RECIPE:

3 extra ripe bananas
½ cup plain full-fat Greek yogurt 
2 pasture-raised eggs 
¼ cup coconut sugar 
2 tbsp butter or coconut oil, melted and cooled
1 teaspoon vanilla extract 
⅓ cup collagen peptides 
¾ cup almond flour 
½ cup rolled oats 
Pinch of sea salt 
¾ teaspoon cinnamon 
1 tsp baking powder
½ tsp baking soda
½ cup roughly chopped dark chocolate 

  1. Preheat the oven to 350F and line a loaf pan with parchment paper. 

  2. Use a stand mixer or hand mixer to mash the bananas completely until barely any lumps remain. Whisk in the eggs, Greek yogurt, coconut sugar, butter and vanilla extract and mix until fully incorporated. 

  3. In a separate bowl, stir together the collagen peptides, almond flour, oats, spices, and baking powder and soda until combined. Working in batches, slowly add the dry ingredients to the wet and mix until no clumps of dry remain. 

  4. Stir in about 75% of the chocolate, leaving the rest for topping. Transfer the batter to the loaf pan and bake for about 60-65 minutes. 

  5. Cool completely in the loaf pan before slicing (at least an hour). 

  6. Store leftovers in an airtight container in the fridge for up to 1 week. Enjoy!